Tag Archives: STEM

Tinkering MOOC -week 2 (cont)

Further to my last Tinkering MOOC post – I have now created more circuit blocks to play with. I’ve been away a bit so I’m catching up now – I’m still waiting for my potentiometers to arrive though 😦

I’ve been playing around with the blocks – the making them and trying some things out.

I found a fan in the pound shop so took it apart and used the motor from it to mount on a circuit block. The white thing I mounted the motor onto is part of an old roller blind – the hole in the middle seems pretty perfect to fit the motor in. I then glued the motor into place with a glue gun. I left the little plastic fan blades attached to the fan. I was hoping to get more parts from the fan – a switch or battery holder perhaps but that was not the case. Paying £1 to get a motor out was still cheaper than buying a motor though!

WP_20150809_002 WP_20150809_003 WP_20150809_004

I also found some circuit stuff while sorting a box in my garage – particularly some LEDs and adapters to add fibre optics. I had a go at making a block with them…

WP_20150810_002

WP_20150810_001

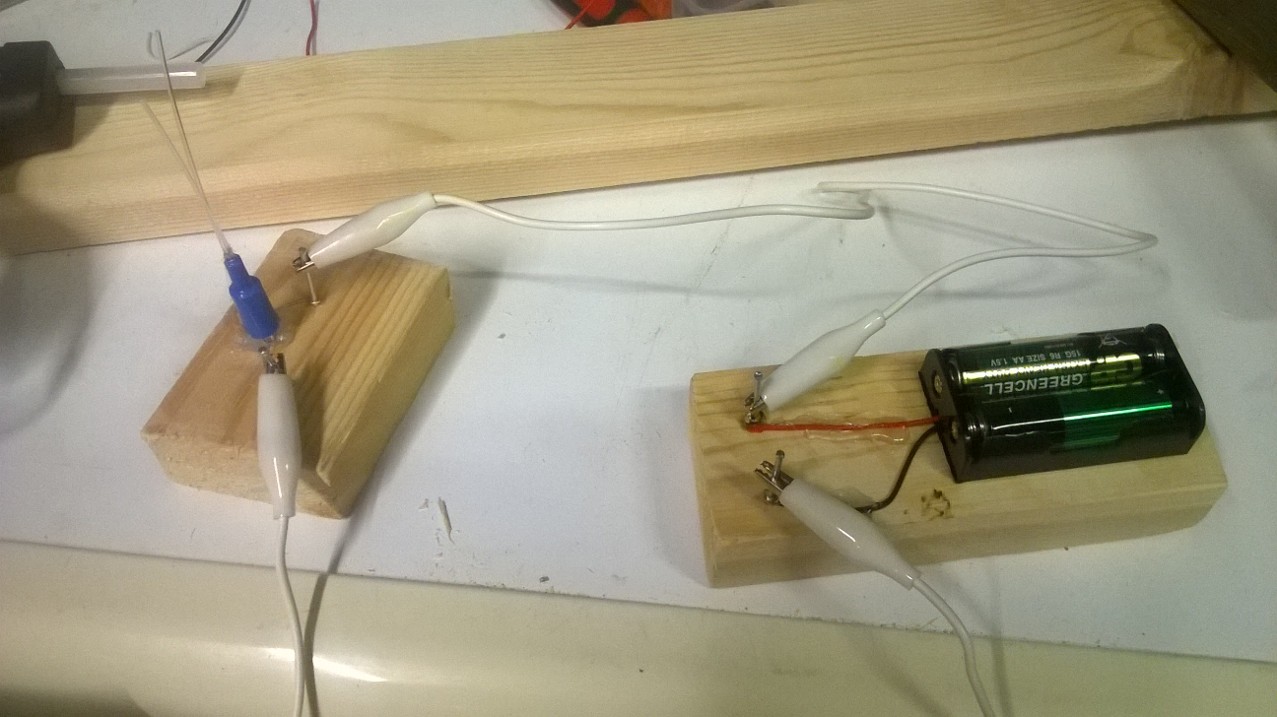
It also leads me to a circuit that didn’t work (initially)- the LED has a positive and negative side and I needed to make sure they were hooked up the right way. Hard to tell when I’d bend the metal bits coming out of them and attached them nails so I just had to try both ways! Fun though, when it lit up it kind of reminded me of a little bug.

WP_20150810_004

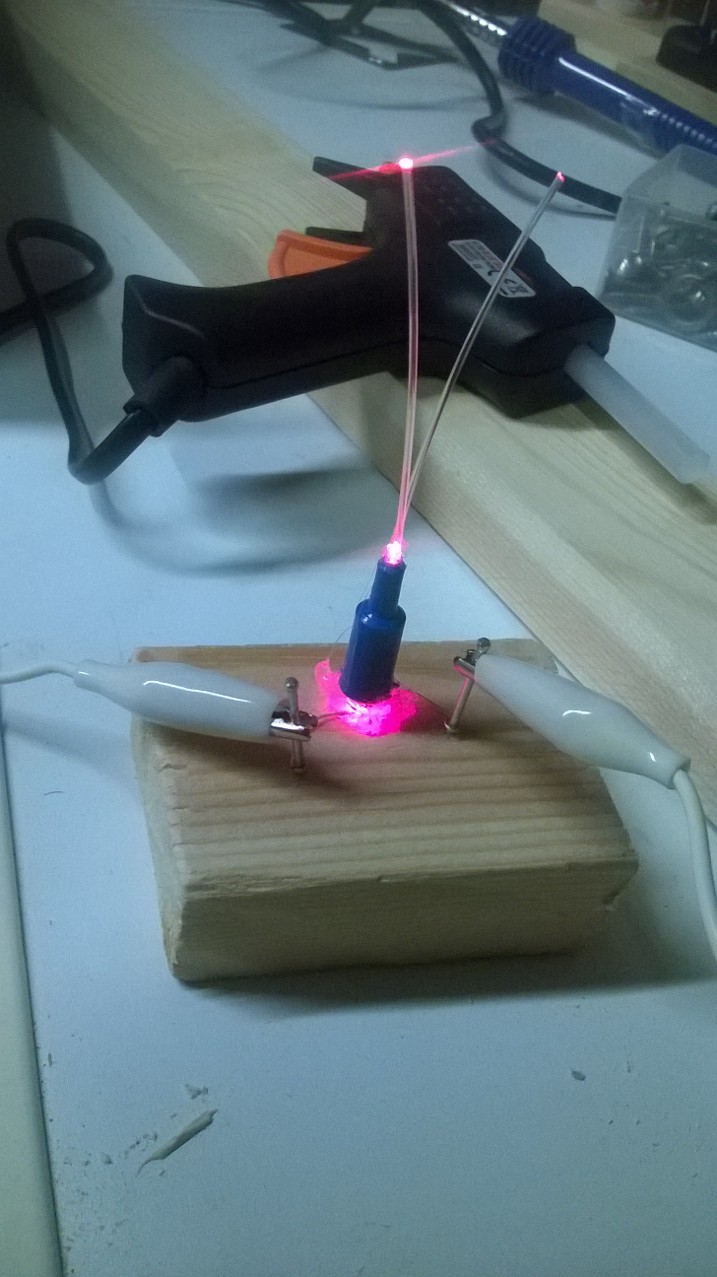
One thing I noticed about this and loved was how the light also travels through the glue from my gluegun. I want to now go and play around with this to see what shapes I can make with the glue and how well the light will travel. Certainly an ‘ooooh’ moment for me!

WP_20150810_005


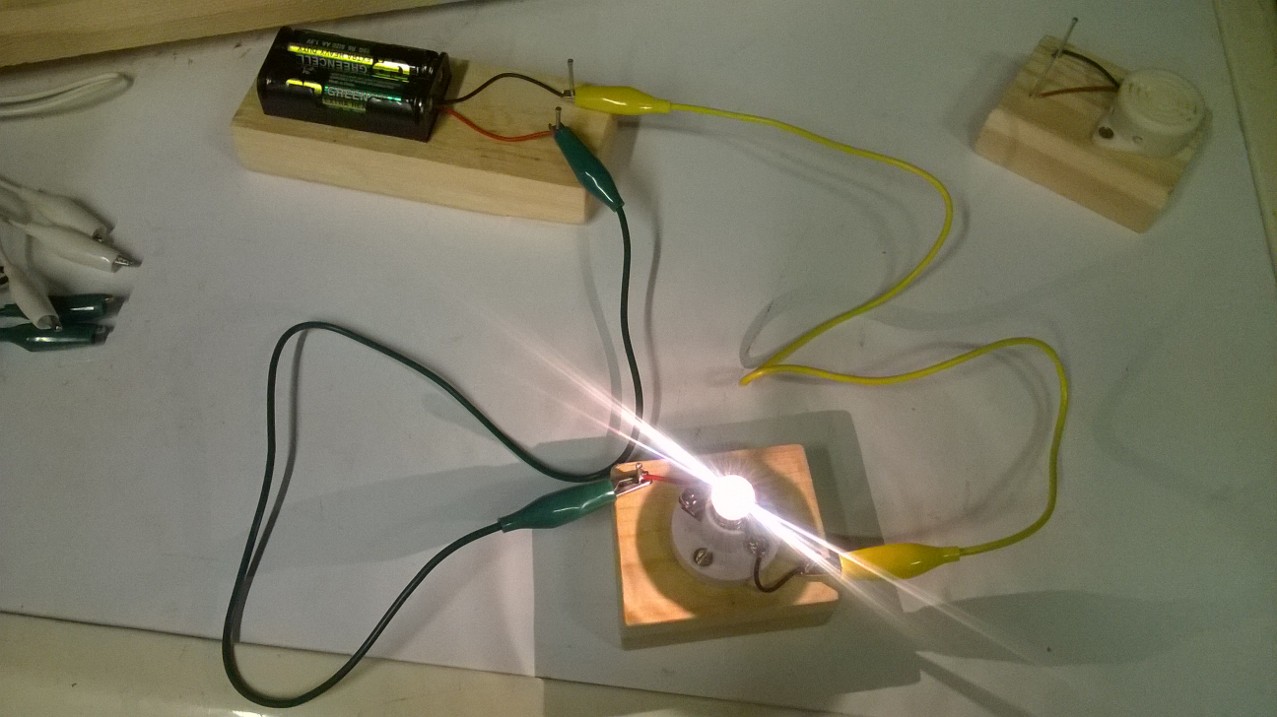
I played around with the kit I had, and have tried making blocks with more than one bulb on too. I think I might have a bit of a circuit block addiction now – if I pass a charity chop or pound store I have to go in and have a look if they have anything I can use. On the MOOC forum someone suggested chopping up Christmas lights and using them on blocks which I think is a fab idea!

One thing that interested me was that when I attached the motor with the fan blades to the battery the fan actually caused the block to lift slightly and it floated around the surface as far as the wires attached would let it.

One circuit I found interesting was attaching the motor with fan bits, a bulb and battery holder with two AA batteries in a series circuit. The bulb lit up but the fan didn’t move – until I knocked it! Once started it continued spinning round until I disconnected the battery from the circuit. Bizarre! Not enough power I guess.

I wanted to take this further so I also tried making the circuit pictured below. The far left is the motor with fan blades, the middle is a buzzer and the left is a bulb in a holder all attached to a battery holder containing two AA batteries.

WP_20150809_014

With this circuit the bulb didn’t light, the fan didn’t spin (even when nudged), but the buzzer did sound! I think I need to add more power to the circuit to get all three to work? The electricity must be passing through the motor and bulb though as the buzzer wouldn’t work otherwise. Alas all the other AA batteries seem to have disappeared so I’ll try it out with more when I’ve had the opportunity to buy some more. Interesting though.

These blocks take a little while to make but are so rewarding! They are a bit addictive too! Playing with circuits is also lots of fun! I think this would be so much fun to do with people of all ages – I’d be very keen on seeing if I could take my kit to my daughters after school club for them to try out! I think it is really good to explore the blocks and can lead to a rich learning experience (it certainly has for me!). I’ve gained lots of experience by making the blocks, opening up my imagination to think about fun and interesting things I could put on the blocks (like the LED fibre optic thing) as well as standard things like bulbs, motors etc…


Tinkering MOOC – Week 2

This weeks task is to create circuit blocks. This involves:

  • cutting bits of wood to fit circuit components on
  • sanding them down
  • attaching the components
  • adding bits of wire and nails where necessary
  • soldering said bits of wire to said bits of nail
  • testing out and playing with the finished bits

To cut the pieces I considered using the scary saw (circular saw but it scares me slightly as it broke the first time I tried to use it ages ago and I haven’t been near again since) but opted for using a normal saw instead. The results are slower but fine really. Sanding wasn’t a problem I have done plenty of that when decorating, and screwing the bits down was easy enough.

There were some new(ish) skills for me here – I haven’t really done any soldering since woodwork at school which was many years ago now. Coincidentally (and luckily for me) I was scheduled to work part of the Science Summer Camp week at work that took place at the beginning of the summer holidays and part of that day involved a lesson in soldering – hoorah! WP_20150807_044

I think my soldering was not too bad – I even remembered to heat the surface I want to solder rather than the solder itself (with reasonable success I think).

WP_20150807_045


Here’s the first circuit I got to work. It’s pretty basic but it made me happy. It didn’t work to begin with but that’s because I managed to melt part of the plastic around one of the wires while I was soldering. I had to take it apart and strip more wire to stop it from being insulated. Oops! Hopefully I won’t be making that mistake again.

WP_20150807_042

I have a couple more bits to mount – I want to try a couple of bulbs in a row and have some switches to try out too…


Tinkering Fundementals (Coursera)

A while ago I was researching making and tinkering and came across ‘ Tinkering Fundementals: A Constructionist Approach to STEM Learning‘ and thought why not sign up. It had a scheduled start date so I’ve had a while to wait for it! In the mean time I’ve been trying out a few other courses and getting the equipment ready from the provided list.

The course started last week so be prepared for many tinkering posts 🙂

The course looks at tinkering as an approach to learning and I think will make me think more about what tinkering is and means to me as well as how to do it and lots of activity ideas – most are based on circuits which I’m looking forwards to because I hope it gives lots of engaging ideas rather than the dull activities I have come across before. I found circuits particularly dull when I was in school so anything to liven them up and make them a bit more engaging would be great.

As part of the course we are to keep a tinkering journal – Week 1 questions what our ideas of tinkering are and our past experiences.

To me tinkering is a bit like play. It involves (generally) open ended activities that people can do and explore ideas and build on prior knowledge as well as developing new knowledge by trial and error. There is not necessarily a set outcome from the activity but people are free to try out their ideas and amend them as much as they wish.

From a teaching/ public engagement perspective I’d expect to be a sort of facilitator, providing a considered and supportive environment for people to tinker in. Not necessarily there to tell people how to do something (unless it was a set skill – e.g. soldering) but to question and make people think for themselves, give people ownership of their tinkering and to support share examples if needed.

I hadn’t really thought about it before as ‘tinkering’ but a lot of the things I do could fall into this – at home and at work – from the crafting and sewing I do (especially editing (tinkering?) the patterns I use/ create) to the activities we have run on gallery at work.

I think I’m going to enjoy this course. 🙂